In 1729, the world learned that there are materials on earth (mostly metals) that can pass current through themselves. These materials became known as conductors. Other substances (for example, amber, glass, wax) that do not conduct current were also found, which became known as insulators. But humanity was able to use electricity only at the beginning of the 17th century. It became clear that current could be used to produce heat and light. It was then established that electricity is a flow of small charged particles - electrons. And each of them carries a small charge of energy. But when many electrons collect, the charge becomes large, and that's when electrical voltage appears. Therefore, electricity can travel long distances through wires.
Let's look at one interesting phenomenon. A man takes off his sweater over his head and suddenly, out of the blue, a crash is heard. If you undress in the dark, you can observe how this crackling sound is accompanied by sparks. It sparks and cracks clothes. Looking more closely, you can see that the sweater is adjacent to the shirt that was still worn on the body. Thus, a current arises between things. Its manifestation on different objects leads not only to attraction, but also to repulsion. This is the action of electricity. It turns out that nowadays a person cannot take a single step without electricity.
Electricity from water at home
This pipe can convert the pressure of tap water into electricity, which can be used for home use.
To generate electricity, you need to install a device in the pipe, then open the valve. The water will then produce the desired electricity by moving small wheels inside the device.
The generated energy is accumulated in special lamps, which are installed after charging in their place for the intended use, and the brightness of their glow can be adjusted.
This method can be used by people all over the world where tap water is available. It's strange that no one thought of this before. Therefore, Choi’s invention reached the finals of an industrial design competition and is already being prepared for serial production. One English inventor, Ryan Yongwoo Choi, developed a method for generating electricity at home from tap water, and came up with a pipe that has a water wheel inside, and called it ES Pipe Waterwheel.
Solar panels

Solar panels are a great way to generate electricity for your home.
But this business requires some costs to purchase solar panels, of which you need a lot. But these technologies are expanding every year, and solar panels are decreasing in cost.
Pros:
Produces electricity at any time.
To create electricity you need sunlight.
No other fuel needed.
Environmental Safety.
No noise.
Minuses:
Considerable open space is required.
No electricity is produced at night or during rainy weather.
Expensive and fragile panels.
Creative approach
One summer resident invented a device that is a wheel in which hamsters constantly run, but only large ones. A dog was let into this wheel and began to run around there. This wheel was then connected to the generator using several belt drives. The generator produced electricity by converting the dog's energy into electricity.
How to get electricity from potatoes 
Almost any vegetable or fruit has electricity. To create a current generator you will need:
Potatoes 1 piece;
toothpicks 2 pcs;
salt;
tea spoon;
wires 2 pcs;
toothpaste.
The wires need to be cleaned. Cut the potatoes into 2 halves with a knife. Pull the wire through one half of the potato. Using a teaspoon, make a hole in the other half of the potato - its size is equal to the size of the spoon.
Mix toothpaste with salt and fill the hole made in the cut potatoes. Connect the two potato halves with toothpicks. The generator is now ready!
To extract voltage, you need to wrap a piece of cotton wool around one of the wires. Wait two minutes (until the battery charges).
Then bring the wires close to each other until a spark appears.
How to produce electricity in small quantities
For this you will need: aluminum foil, copper and aluminum pins, copper wire, transistor, salt, water.
1. The aluminum pin must be inserted deeply into the tree so that the pin passes through the bark and penetrates a considerable distance into the trunk. Then, stick a copper pin into the ground, about thirty cm. If you insert not just one pin, but several into the tree, there will be more electricity. The voltage between the pins will be about 1 V.
2. Take the transistor and open it, but the main thing is not to damage the crystal inside the case. Connect the wires to one of the junctions, “collector-base” or “emitter-base”. On a sunny day, instead of a transistor, you can use a photocell; between the wires there will be a voltage of approximately 0.2 V. Using several transistors you can make a battery.
3. Take several glasses and fill them with a solution of table salt. Next, take several pieces of copper wire and wrap aluminum foil around one end of each piece. Use these wires to connect the glasses with the solution so that in one glass the wire is with its bare end, and in the other it is wrapped in foil. The resulting voltage will depend on the number of glasses.
Of course, it is difficult to completely provide your home with your own electricity. There are too many power-hungry electrical appliances: computers, microwaves, refrigerators, multi-cookers, TVs and others. All these devices consume a lot of electricity; today we cannot generate 100% of such electricity at home. But what is really real is saving and reducing your electricity bills.
Electricity is becoming more expensive every day and it’s time to learn how to generate energy yourself, but it’s not difficult, read carefully. The article describes how free energy for the home is obtained from the energy of air and earth with your own hands.
DIY energy from thin air
We create a wind generator with our own hands at home
A simple, low-power windmill can be created at home. Based on the selected type of wind generator, you can begin assembling it. An example of wind generator assembly will be considered on a hybrid model that combines a Darrieus and Savonius generator. Rotor assembly The base of the rotor will be made up. 6 neodymium magnets of type D30xH10 mm, followed by 6 ring magnets made of ferrite D72xd32xH15 mm and two metal disks D230xH5 mm, the parts will be fixed using epoxy resin and glue.
DIY windmill rotor On each of the metal disks, 6 neodymium magnets are placed, and their polarity must be alternated and placed at an angle of 60 degrees, the diameter of the circle of the installed magnets should be 165 mm.
 Rotor dimensions
 Rotor dimensions Ring magnets are placed on the second disk in a similar way. In order for the magnets to “sit” firmly in their places during operation, they are filled with epoxy resin.
Assembling the stator
The basis for the stator will be 9 coils with 60 turns wound on each, the thickness of the wire used should be 1 mm. Next, the 1, 4, 7 coils for the first phase, 2, 5, 8 for the second phase and, respectively, 3, 6, 9 for the third are connected in series.
The supporting frame of the wind turbine consists of:
- Square profile pipe 25x25 mm with a wall thickness of 2 mm, length 920 mm.
- Adapter flange with a diameter of 50 mm from a square pipe to a round pipe with a diameter of 50 mm
- A pipe made of a water pipe with a diameter of 50 mm and a length of 150 mm
- Self-tapping screws 19 mm (3 pcs.)
If you have the opportunity to use a welding machine, then weld a piece of 50 mm pipe to a 15 cm long square pipe, without using an adapter flange or self-tapping screws.
Engine mount:
- Diode bridge (30 – 50 A)
- Clamps for mounting an engine with a diameter of 60-80 mm (2 pcs.) or two bolts with M8x40 nuts.
- A piece of PVC pipe with a diameter of about 75 mm and a length of 280 mm
Tail rudder:
- Square piece of thin sheet metal or tin 300 x 300 mm
- Self-tapping screws 4 x 19 mm (2 pcs.)
- A piece of PVC pipe with a diameter of 200 mm, a length of 600 mm with a wall thickness of 5-6 mm. For example, PVC sewer pipe class SN8 200×5.9 - 1000mm.
- Bolts M6x20 mm (6 pcs.)
- Washers 6 mm (9 pcs.)
If you lift a pipe with a wall thickness of 1-2 mm, then with strong gusts of wind the blades will bend and may collapse.
Blade cutting
To make the blades, you need to cut the pipe into four identical plates 145 mm wide. From one piece of pipe you should get four plates with a width of 145 mm and one slightly smaller. This will be three sets of blades (nine in total) and a piece of waste. Place a 60cm long PVC pipe on a table, floor or any flat surface. Draw a straight line along the axis of the pipe using a piece of square pipe (you can use a meter ruler or any other sufficiently long object with a straight edge). Let's call this line A.
Take a tape measure and set a 145 mm measurement from line A at each end of the pipe, make marks at each end of the pipe. Connect the resulting marks with a straight line along the axis of the pipe. Repeat the described operation three more times. We will get four sectors 145 mm long and the last segment should be about 115 mm long.
You have four identical sectors measuring approximately 75 degrees and one sector measuring 60 degrees. Cut the pipe along these lines using a jigsaw, so that you get four strips 145 mm wide and one about 115 mm wide.
Lay out all the strips with the inner surface of the pipe facing down. From one sector we get two blades. To do this, make marks on each strip along the narrow side at one end, retreating 115 mm from the left edge. Repeat the same from the other end, retreating 30 mm from the left edge. Connect these points with lines, intersecting the strips of the cut pipe diagonally.
Cut the plastic along these lines using a jigsaw. Place the resulting pipe sectors with the inner surface of the pipe down. Now let's cut off the corner at the base of the blade. To do this, make a mark on each along the diagonal cut line at a distance of 75 mm from the wide end of the blade. Make another mark on the wide end of each blade 25mm from the long straight edge. Connect these points with a line and cut the resulting corner along it.
This will prevent the blades from being twisted by side winds.
It must be like this
Blade processing.
From the resulting blanks, we need to give the future blades an aerodynamic shape. The figure shows a cross-section of the blade profile. You must file and sand the blades to achieve the desired profile. This will improve their efficiency and also make them spin quieter.
The leading edge should be rounded and the trailing edge should be pointed. To reduce noise, any sharp corners should be rounded. Just don't get carried away. The blades should not be thin.
Cutting out the tail rudder.
The dimensions of the tail rudder are not critical. You need a piece of thin sheet measuring 300 x 300 mm, preferably thin metal or tin. You can cut the tail rudder into any shape, the main criterion is its rigidity.
To drill holes in the blades, use a 6.5 mm drill. Mark two holes on the wide end of each of the three blades along their straight (back) edge. The first hole should be 9.5mm from the straight edge and 13mm from the bottom edge of the blade. The second is at a distance of 9.5 mm from the straight edge and 32 mm from the lower edge of the blade.
Drill these six holes into the blades.
The treadmill motor comes with a bushing attached to it. To remove it, firmly lock the shaft protruding from the bushing with pliers and turn the bushing clockwise. It unscrews clockwise, which is why the blades rotate counterclockwise.
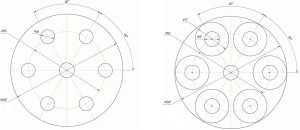
- Make a template for the sleeve on a piece of paper using a compass and protractor.
- Mark three holes, each 6 cm from the center of the circle and equidistant from each other.
- Place this template on the sleeve and punch pilot holes through the paper at the marked locations.
- The accuracy of installing the blades at an angle of 120 degrees to each other and, accordingly, balancing the wind wheel depends on how the holes are drilled in the hub.
- Drilling holes in the bushing is carried out in two stages. First, holes are drilled that are closer to the center of the bushing. Drilling and tapping holes in the bushing - use a 5.5 mm drill and an M6 tap
- Screw the blades to the hub with three M6x20 mm bolts, one for each blade. At this moment, the outer holes close to the boundaries of the bushing have not yet been drilled.
- Measure the distance between the leading edges of the tips of each blade.
- Adjust them so that you form an equilateral triangle and all the tips of the blades are equidistant from each other.
- Mark and tap the top second hole on the hub through the hole in each blade.
- Make marks on each blade and bushing so that you do not mix up where each one is attached at a later stage of assembly.
- Unscrew the blades from the hub and drill and tap these three outer holes.
Manufacturing a protective casing for the engine.
- On our piece of PVC pipe with a diameter of 75 mm, draw two parallel lines along its length at a distance of 20 mm from each other.
- Cut the pipe along these lines.
- Cut one end of the pipe at a 45° angle.
- Place needle-nosed pliers into the hole created and inspect the pipe through it.
- Align the bolt holes on the motor down the middle of the slot in the PVC pipe and place the motor into the pipe.
Final assembly of the wind generator
Place the motor on the square pipe and screw it to it using clamps or bolts if there are holes for mounting.
Place the diode on a square pipe behind the motor at a distance of 5 cm from it. Screw it to the pipe with a self-tapping screw.
Connect the black wire coming out of the engine to the “positive” incoming contact of the diode (it is marked AC on the “plus” side).
Connect the red wire coming out of the engine to the “negative” incoming contact of the diode (it is marked AC on the “minus” side).
To attach the tail rudder, position it so that the end of the square pipe opposite the one on which the engine is located runs through the middle of the rudder. Press the steering wheel against the pipe using a clamp or vice.
- Screw the shank to the pipe using two self-tapping screws.
- Place all the blades on the hub so that all the holes line up.
- Using M6x20 mm bolts and washers, screw the blades to the bushing.
- For the three inner circle holes (closest to the hub axis), use two washers, one on each side of the blade.
- For the other three, use one at a time (from the side of the blade closest to the bolt head).
- Pull tight.
- Securely secure the motor shaft (which went through the hole in the bushing) with pliers and, with the bushing on, turn it counterclockwise until it is completely screwed in.
- Using a gas wrench, tightly screw the 50 mm diameter pipe to the adapter flange.
- Install the pipe vertically into some device so that the flange is located horizontally (for example, in the hole in a tabletop or in a vice).
- Position the square pipe carrying the motor and tail on the adapter flange so that it is in balance.
- Once balanced, mark the square tube through the holes in the flange to install the screws.
- Drill two holes with a 5.5mm drill bit. For convenience, remove the tail and adapter sleeve so that they do not interfere with drilling.
Screw the supporting square pipe to the flange with two self-tapping screws.
The final touch that will give your wind generator an original look will be its painting. Here you can do everything as you wish. The only recommendation in order to extend the life of your wind generator is to choose weather-resistant exterior paint.
After painting, install the casing on the generator and secure it with two clamps. The wind generator is ready.
In the simplest version, we get a voltage of 3 V. This, of course, is not enough for a home, but the system can be complicated, thereby increasing the power.
Neutral wire – load – soil
Voltage to living quarters supplied through 2 conductors: phase and neutral. When creating a third, grounded conductor, a voltage of 10 to 20 V arises between it and the zero contact.
This voltage is enough to light a couple of light bulbs. Thus, to connect electricity consumers to “ground” electricity, it is enough to create a circuit: neutral wire - load - soil. Craftsmen can improve this primitive circuit and obtain a higher voltage current.
Many thanks to the sites for the excellent material: www.0el.ru,lidol.ruotlad.ru
The energy potential of the Earth is unimaginably huge. The planet's magnetic field, together with solar radiation, contributes to the generation of colossal amounts of electrical energy. This is confirmed by electrical spark discharges in the form of lightning. During a lightning discharge, although very briefly, a power of about 100 million kW develops. The only problem is how to extract this energy and use it to your advantage.
Electric potential of the atmosphere
The potential difference between the earth's surface and the ionosphere is about 300,000 Volts. The electric field strength near the surface reaches 150 volts per meter (V/m) and decreases exponentially with increasing altitude. At an altitude of 30 km, the voltage value is about 1 V/m. At the ionospheric level, the field strength tends to zero, due to an increase in the conductivity of the medium as a result of ionization under the influence of solar radiation.
Many of us have felt the effects of atmospheric charge accumulation. For example, in dry, windy weather, when leaving the car, you can feel a discharge of static voltage. The fact is that the electric charge accumulates on the car thanks to the tires. Rubber tires are a good insulator that prevents the charge from flowing to the ground. When leaving the car, the accumulated charge from the body goes into the ground through our body in the form of a spark and a slight but unpleasant electric shock.
The idea of harnessing lightning energy looks tempting, but there are a lot of technical difficulties along the way. The enormous energy contained in lightning is very short-lived and unstable. You need to catch the discharge and direct the energy into some kind of storage device. Since the location of a lightning strike is unpredictable and the peak power is very high, modern technology does not have sufficient capabilities to cope with this task.
Theoretically, if you take two sheets of metal with an area of 1 m2 and space them at a distance of 500 m vertically relative to the surface of the earth, the voltage between them will be about 80 V. Obviously, the feasibility and efficiency of such a “power plant” is very doubtful, given the scale of the required structure for posting sheets.
Despite the fact that the Earth's atmosphere is literally saturated with electricity, there is no effective way to extract and use this energy today.

Ground battery
This method has nothing to do with the magnetic or electric fields of the planet. It is based on the phenomenon of the occurrence of electric current between dissimilar metal electrodes in an electrolyte environment.
Pins made of various metals can be used as electrodes. A pair of copper with aluminum or zinc has optimal efficiency. You can use a galvanized steel electrode. By driving the electrodes into the ground at a distance of about 20 cm and watering the ground between them with a solution of table salt, you can detect the presence of a voltage between the electrodes in the region of 3 V.
The efficiency of this power plant depends on many factors: soil moisture, salt concentration in it, electrode area, temperature and many others. By increasing the number of electrodes and using series-parallel circuits for connecting earth elements, it is possible to obtain different levels of voltage and power of the earth battery. By collecting about a hundred cells in series, it is quite possible to get 220V from the ground. The second option is to use a boost voltage converter.
Considering the quantity and cost of non-ferrous metals used, this method, like the previous one, is hardly justified economically. In addition, the saline solution will spoil the soil, making it unsuitable for plant growth.

Electricity from the neutral wire
As a rule, a three-phase network with a solidly grounded neutral is used to power residential buildings. Individual consumers are supplied with phase voltage from one phase and a neutral wire. If the house has a reliable grounding circuit with low resistance, then during periods of intense consumption of electrical energy, a potential difference is formed between the neutral wire of the supply network and the grounding conductor. This difference can reach 12-15 V. The problem lies in the instability of the voltage between zero and ground, which directly depends on the amount of power consumed by the house. The maximum voltage is achieved only at peak current consumption.
The methods of generating electricity described above are quite workable. Using pulse electronic converters, it is possible to obtain a voltage of any value. However, for actual use in everyday life, the described methods are not suitable due to the very low power of such current sources. The exception is a circuit with metal electrodes, but to achieve acceptable power, you will need to occupy a large area with metal pins and periodically water it with a salt solution. Getting enough electricity from the ground to use is not as easy as it seems. Despite the fact that magnetic and electric fields envelop the planet, today there is no technical possibility to use this potential. Such methods cannot be considered as a source of energy supply to the home. With your own hands, you can only build a power source for a pair of LEDs, a clock or a radio with a very low level of power consumption.
The benefits, and sometimes the need, of electricity are difficult to underestimate. Especially in emergency conditions. You may need to charge your walkie-talkie, flashlight, or cell phone. In this article we will talk about ways to alternatively generate electricity from scrap materials.
Trees
For almost any simple method of generating electricity without connecting to an existing electrical network, you will definitely need galvanic elements, namely two metals that, when paired, form oppositely polarized anode and cathode, respectively. Now all that remains is to stick one of them, for example, an aluminum rod or an iron nail, into the nearest tree so that it completely penetrates through the bark into the tree trunk itself, and stick another element, for example, a copper tube, into the soil nearby so that it enters the ground 15- 20 cm. It is possible that even between the copper tube and the aluminum rod a voltage of approximately 1 Volt will arise. The more rods you insert into the tree, the better the quality of the electricity produced this way. After you finish extracting electricity, be sure to clean up the mess and cover the damaged areas on the tree with resin.
Fruits
 Oranges, lemons and other citrus fruits are all ideal electrolytes for generating electricity in extreme conditions, especially if the extreme situation finds you close to the equator. In addition to the already known aluminum and copper, you can use more effective gold and silver if you or your companion still have jewelry on, bringing the voltage of your electricity up to 2 Volts. If you are generating electricity for the purpose of lighting, then a glass bulb with a piece of charred bamboo fiber as a filament can serve as a light bulb. This homemade filament was used by Edison himself for the first light bulb in the world.
Water
If you have copper wire and foil, generating electricity in this case will take a minimum of effort. We fill several glasses with salt water and connect them with copper wire, from glass to glass. Aluminum foil should be wrapped around one end of each wire connecting the glasses. Accordingly, the more wire and glasses. the higher your chances! This type of device was invented back in the 18th century, it is called a “Voltaic Pillar”. But in this case, copper-zinc elements are used. The scheme for their manufacture is shown below:


Potato
 You can also get electricity from ordinary potato tubers; all you need is salt, toothpaste, wires and potatoes. Cut it in half with a knife, pass the wires through one half, while in the other make a spoon-shaped depression in the center, then fill it with toothpaste mixed with salt. Connect the potato halves, and the wires should come into contact with toothpaste, and it is better to clean them themselves. All! Now you can use your electricity generator to light fires from an electric spark.
Battery manufacturing
Lead and sulfuric acid have proven themselves for decades as a universal generator of electricity with excellent power quality, used everywhere, for example, in batteries of various vehicles. To do this, you will need both components, which you need to combine in a ceramic dish (finding clay in extreme conditions and firing it should not be difficult for you, this also applies to glasses in the case of generating electricity from salt water). If the question remains with sulfuric acid, then it is not difficult to obtain it from sulfur by burning it with an excess of oxygen and water. If there is neither one nor the other, electricity will bring you the mineral “galena,” which, already at a temperature of 327 degrees, when mixed with coal, melts into sulfur and lead.
Let's say you find yourself on a desert island or stuck in a country house no electricity, and the phone battery is low. They will help you make a life-saving call that could possibly save someone’s life. The following tips for generating electricity.
You never know when you might need electricity.
How to get electricity:
Method 1. Electricity from wood.
For almost any simple way to get electricity for free without connecting to an existing electrical network will definitely be needed galvanic cells, namely two metals that, when paired, form oppositely polarized anode and cathode respectively.
Now all that remains is to stick one of them, for example, an aluminum rod or an iron nail, into the nearest tree so that it completely penetrates through the bark into the tree trunk itself, and stick another element, for example, a copper tube, into the soil nearby so that it enters the ground 15- 20 cm. I would not be surprised if a voltage of approximately 1 Volt arises between the copper tube and the aluminum rod. The more rods you insert into the tree, the better the quality of electricity produced in this way (current strength). Just don’t get carried away, remember that the tree is as alive as you. You should use this method only as a last resort! Don’t forget to then remove the pins from the wood and cover them with resin.
How to get electricity:Method 2
Electricity from fruits?
Oranges, lemons, potatoes and other fruits are all ideal electrolytes for generating electricity, especially if an extreme situation finds you close to the equator. , bringing the voltage of your electricity to as much as 2 Volts!

How to get electricity:Method 3. Electricity from salt water?
If you have there is copper wire and foil, the cost of generating electricity in this case will be zero. We fill several glasses with salt water and connect them with copper wire, from glass to glass. One end of each wire connecting the glasses should be wound aluminium foil.
How to get electricity:Method 4. Electricity from potatoes?
You don't have it at your dacha electricity but there is a bag potatoes. From potato tubers you can get electricity for free, all we need is salt, toothpaste, wires And potato.
Cut it in half with a knife, pass the wires through one half, while in the other make a spoon-shaped depression in the center, then fill it with toothpaste mixed with salt.
Connect the halves potatoes(for example, toothpicks), and the wires should be in contact with toothpaste, and it’s better to clean them themselves. All! Now you can use your electricity generator to torture people by lighting fires with an electric spark and lighting improvised light bulbs with charred bamboo fibers instead of filaments.
Then you can cook the remaining potatoes on the same fire)

What metals are best?
Here is a short table of the voltage series. The further the metals are from each other, the greater the voltage, under all other identical conditions, you will get:

How to get electricity:Method 5. Electricity from thin air?
Definitely build a wind turbine, which by the way is not that difficult. All you need are helical blades, rotated by the force of the wind, and an electricity generator for converting mechanical energy into electricity.

You can also get free electricity from any motor!
*How to make a battery?
For decades, lead and sulfuric acid have proven themselves to be a universal generator of electricity with excellent power quality, used everywhere, for example in car batteries.
To do this, we will need both components, which need to be combined in a ceramic vessel (finding clay in extreme conditions and firing it should not be difficult for you).