It is not always possible to purchase the desired variety of fruit crop, so domestic gardeners are looking for other ways to obtain plants. Propagating grapes by cuttings at home will make it easy to root elite and rare varieties. In our review we will tell you in detail about the available methods that will help increase plantings.

Preparation and storage
Propagating fruit vines is not as easy as the authors of the videos on the Internet claim. The most reliable and common method at home is cuttings. The gardener controls all stages of crop formation and can adjust the temperature or humidity at any time. For high-quality breeding, you need to properly prepare the chubuks, so we will dwell on this process.
Propagation of grapes by cuttings in the fall begins with preliminary work. Healthy and strong shoots ripen during the summer. Weak, diseased lashes can be recognized by their characteristic signs:
- heterogeneous color;
- damage from pests or diseases;
- They do not crack when bent.
Thick, “fattening” branches are not suitable for propagating grapes by cuttings. After the foliage has fallen from the plants in the fall, you need to have time to prepare the chibouks before the onset of the first frost. The cut vines are cleared of tendrils and chopped into pieces ranging from 50 to 75 cm in length. The longer the raw material, the more efficient the process and with less waste, so professionals recommend vines up to 120 cm.
At home, treatment of cuttings against diseases and rot proceeds according to the following scheme:
- stand in clean water for a day;
- soak for 30 minutes in a solution of potassium permanganate or copper sulfate;
- dry on paper.
Then the material is collected into bundles, marked with a label with the name of the variety, tightly wrapped in film and sent for storage. There are several ways to properly preserve grapes in winter:
- in a refrigerator;
- on the loggia;
- in the basement;
- buried in the ground.
In the first three cases, the gardener controls all storage processes, so he can prevent premature swelling of the buds and the appearance of green leaves. It is recommended to winter at temperatures from 1 to 5 degrees above zero. If mold occurs, you need to wipe the affected areas with potassium permanganate. If drying is observed, then it is necessary to re-immerse in liquid, dry and repackage.
For wintering outdoors, chibuki are buried to a depth of at least 40 cm. It is important to monitor weather changes. In mid-February, the plant enters a phase of forced hibernation, so when it gets warmer, it will begin to awaken.
Rooting
In the spring, the interrupted cutting process is continued. If the preparations have been properly wintered, then with the onset of the first sunny days you can awaken the raw materials from hibernation. Disinfect in a manganese solution, and then rinse in warm, clean water. Step back 2 cm from the outermost lower and upper buds, then make a cut. Dilute the Kornevin stimulator according to the instructions and soak the pipes in the solution for 48 hours.
Remember: a cut of a healthy lash looks light green, without the slightest dark inclusions. If liquid does not come out of the wound or it oozes heavily, then the plant has died.
To accelerate the formation of roots, several vertical furrows are made in the lower part with a clean blade, which are sprinkled with Heterouaxin. Callus appears on the damaged side, which further ensures rapid rooting. To slow down the opening of the buds, the bottom is placed in a warm environment, and the tops in a cool environment. For the development of foliage, a properly formed system is necessary, and a deficiency leads to the death of the plant.
If you decide to propagate grapes from cuttings, then you need to germinate the grapes in the spring. Let's look at the most popular methods.
- In a plastic bottle. Cut off the neck of the container, make holes in the bottom and pour in a layer of drainage and soil. The future grapes are installed at an angle so that the upper eye is always level with the top of the head. Then they sprinkle it with steamed sawdust and cover it with a “lid”. The plant is placed on a sunny window. Watering is carried out through a tray with water, leaving the “greenhouse” for 15 minutes.
- Disposable glasses. For the procedure you will need two containers of 500 and 150 ml. Holes are made in the bottom, and then filled with deciduous soil to 2 cm, and wet, clean sand is poured on the sides, in the middle of which a cutting is installed. Cover the top with a small dish. Watering with warm water is done every day.
- In hydrogel. Steamed, cooled sawdust is placed at the bottom of the container, to which a swollen substance is added. The workpieces are placed in the substrate and placed in a warm place. It is important to ensure that the plants have enough moisture and that it does not stagnate, so the product must be diluted according to the instructions.
- Kilchevatel. Large batches can be cut using a special apparatus. The heated box is taken out into a cool room. A damp substrate (sphagnum moss, foam rubber or fabric) is placed at the bottom of the machine. The chubuks are installed with the tops down, the lid is closed and the electricity is turned on.
The top of the greenhouse is removed after the fourth leaf appears on the cuttings. If all procedures are carried out correctly, then young roots will rest against the transparent walls of the container. It is imperative to control the temperature, because a decrease in degrees leads to the appearance of fungi and mold. The entire procedure lasts from two to three weeks.
Transplantation into soil
After the roots have appeared, propagation of grapes by cuttings will proceed faster. In the spring you need to prepare a mixture in which the plants will immediately begin to actively develop. In order for the rooting procedure to proceed without problems, you should not use soil that is too nutritious, enriched with humus and sawdust. The aggressive environment of decomposition of nitrogen and oxygen negatively affects the fragile organs of the chibouks.
To develop, grapes need light, air- and water-permeable soil. Professionals often use vermiculite for these purposes, but if there is no experience in breeding in this way, then it is better to make a high-quality mixture of turf soil and sand yourself.
3 cm of expanded clay is placed at the bottom of the pot, and soil is poured on top. To improve air exchange, you need to make additional holes on all sides. A hole is made in the container with your finger, into which it is filled with sand and the young animals are installed. Then crushing it with the rest of the earth, leaving at least 2 nodules on the surface. When choosing a container for rooting cuttings, you need to give preference to a container from which you can easily remove the plant without injury.
Before planting in open ground, the grapes are hardened off. This procedure will protect the young shoots from burns and additional stress. With the onset of warm days, the boxes are placed outside, under the trees. We recommend shading it with a net from the daytime sun.
Propagation of grapes by cuttings (chubuks)
GRAPES.GROWING SEEDLINGS FROM CUTTINGS
Germinating grape cuttings - the easiest way Part 1
How and when to harvest grape cuttings
Propagation by cuttings in summer and spring is the final stage. The strengthened plants have formed leaves and new green vines, so it’s time to plant them in open ground. For the Middle Zone, the procedure is carried out in May, and in Siberia it is better to give preference to warm June days.
Seedlings are planted at a distance of 2.3-2.7 m from each other and 1.8-2 m between rows.
Dig a hole the length of which exceeds the size of the germination container. A layer of drainage, sand and mineral fertilizers are placed at the bottom. Remember: in the first years of grape life, organic substances are prohibited. Active decomposition of the product releases heat, which burns fragile roots. Give preference to an industrially produced product.
Sifted soil is poured onto the nutrient cushion, and a drain hole is made in the bottom with a stake, the depth of which is at least 10 cm. A seedling is placed in the hole, a peg is driven in nearby, crushed with soil on top and compacted.
After you have managed to plant grapes at home, the plant is immediately watered abundantly. Carefully empty two buckets for each bush, and then hill up. The formed hill should be up to 20 cm high, with the upper bud of the cuttings not lower than 5 cm underground.
Fast cuttings
When fatty and fruitless shoots are broken off in summer, the result is often a lot of branches. You can try to root rare and elite varieties of fruit vines, as well as decorative maiden vines. The raw materials are carefully inspected, selecting branches with three eyes and no painful signs.
Propagation of grapes by green cuttings takes place in a greenhouse. To do this, prepared seedlings are planted in a mixture of soil and washed sand to a depth of 9 cm. Remember: the upper buds are above the ground. Rooting requires frequent watering and maintaining a temperature of 20 to 25 degrees with high indoor humidity. After two weeks, the plants will begin to sprout roots.
A greenhouse is an excellent environment for the development of diseases, therefore, when cuttings, seedlings are treated against mildew and oidium with special preparations. Regular ventilation will get rid of mold and rot.
Propagation of homemade grapes by green cuttings continues in the fall. The vegetation is prepared for wintering, so at the end of summer the greenhouse frames are opened. After two weeks, young animals can carry out vegetation processes under natural conditions. Bushes rooted in this way are watered abundantly and regularly fed with mineral fertilizers.
Experienced gardeners advise leaving annual grapes in the nursery. But if this is not possible, then protective structures must be built to avoid the negative consequences of frost in autumn and winter.
To get a luxurious fruit vine plantation, you do not need to purchase expensive seedlings. Our recommendations will help you propagate grapes from cuttings without problems and without watching obscure information on videos.
The ease of propagation of grapes allows every lover to propagate any valuable variety from a very small number of cuttings to the required number of bushes. In the past, grape bushes were mainly grown from cuttings. This method has not lost its importance in amateur viticulture.
With proper planting of cuttings in a permanent place and good care of them, you can grow the same bushes as from seedlings. In winter, grape cuttings are harvested and stored.
Growing grapes from cuttings at home makes it possible to grow healthy, stable stems of the desired variety. Mastering the technique of preparing a scion for planting is not a tricky matter; it is important to follow the sequence of actions and remember that viable shoots are obtained only from a strong, healthy plant.

A rich harvest of varietal grapes begins with a careful study of the nuances and features of growing grapes from cuttings.

In order to prepare planting material from grapevines in the fall, you will need to follow some rules. Thanks to this, the prepared cuttings will be accepted with a high probability when planted and will not lose their characteristics during long-term winter storage.
Preparing grape cuttings for winter

The cuttings are harvested in the fall, during the period when the leaves completely fall from the grape bushes. In the coming winter, most of the mass of branches that have grown over the summer dies off, so it is recommended to prune the bushes at this time.

This procedure is tolerated by the plant the least painfully, and the cut branches can serve as an excellent material for cutting cuttings and further germinating new grape bushes from them.
In order to cut grape cuttings for storage in winter and germination in spring, you must follow a number of simple rules:
Cuttings are cut (just like pruning bushes) only after the leaves have completely fallen - this means that the plant slows down all growth processes and is already preparing for wintering. In this condition, cutting branches is the least painful.

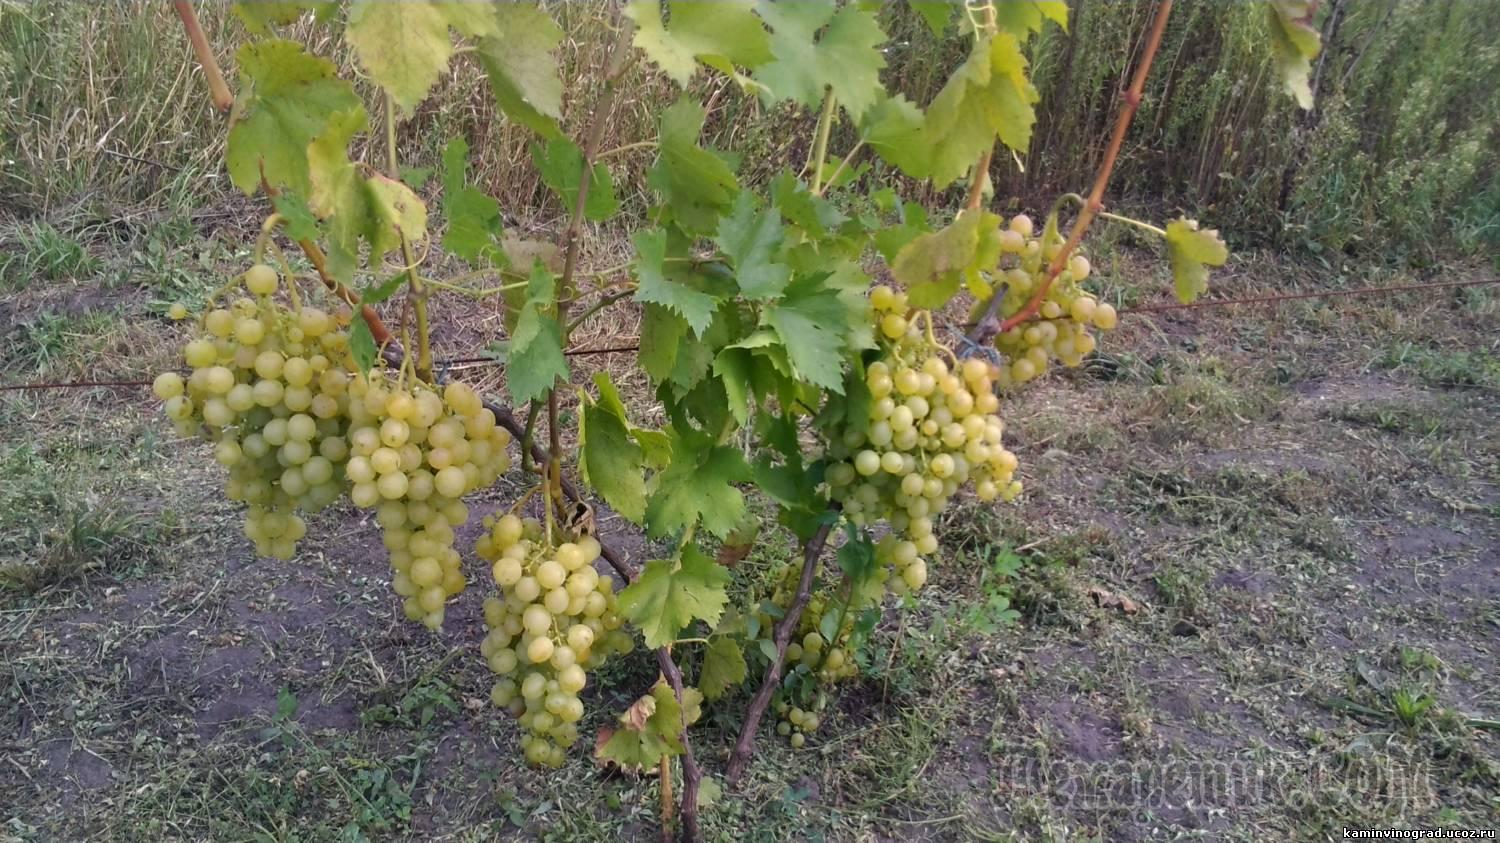
Planting material for propagating grapes by cuttings in the spring is selected from those branches that produce the largest clusters.
You should not choose a vine for cuttings that has a curved shape - as practice shows, the most successful planting material is harvested from the most even sections of the vine.

The thickness of the vine should be approximately 1-1.5 cm; cuttings of this thickness show the highest survival rate when germinated and planted in the ground. Thicker ones may not take root well and take longer to grow, while thinner ones will be painful.

Cuttings are cut no more than 4 buds long; the most optimal length is the presence of 3 fully formed buds.
It is not recommended to keep cut cuttings in the open air for a long time (more than a day), so you should take care in advance about the place of their storage. With prolonged exposure to the open air, the cuts quickly dry out, which subsequently leads to the death of the entire cutting.

Autumn is a favorable time for preparing cuttings in places where bushes are covered before winter. Traditionally, cuttings are taken by pruning the bushes until they are covered. In places where grape crops are not covered for the winter, cuttings are prepared in the fall after the foliage has fallen, also in winter (except on frosty days) and in early spring before the juice begins to flow. Pruning bushes and preparing cuttings should be done simultaneously, without allowing a gap between them. Cuttings are immediately cut from the cut vines and stored.

Harvesting for the winter should be carried out exclusively by variety and a label with its name should be hung on the bunches of each variety.
When preparing cuttings, the shoots and tendrils are removed from the grapevine. Cuttings are harvested 10-15 cm longer than the planting depth established in a given region. The diameter of the cuttings in accordance with the grape variety should be 6-10 mm. Cuttings that are thinner than 6 mm are unsuitable for propagation because they contain a small supply of essential nutrients, and cuttings that are too thick - over 10 mm - are also unsuitable due to fattening.
When propagating acutely scarce grape varieties, cuttings are also prepared from sufficiently developed stepsons, provided that they have a decent thickness.
You should not prepare cuttings for the winter from bushes with signs of frost damage, canker, short knot, mildew, anthracnose, or oidium. You cannot use cuttings with not fully matured tips of vine shoots that have various types of deformities - flattened, very crooked, with very long internodes.
Storing grape cuttings in winter

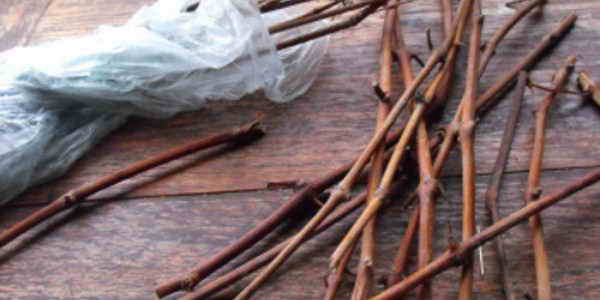
The cuttings tied into bundles are wrapped in 2-3 layers of damp but not wet cloth and placed in a plastic bag, then tied tightly.
When storing grape cuttings in winter, it is necessary to create conditions that would eliminate the possibility of drying out, promote complete preservation of the eyes, minimize the consumption of plastic substances in the cuttings, and do not inhibit their root formation process.

At elevated temperatures and high air humidity, the buds bloom prematurely on the cuttings, mold appears and they rot. If there is insufficient moisture, the cuttings dry out. Before long-term winter storage, they should be treated with a 5% solution of iron sulfate to prevent the possible appearance of mold.
During long-term winter storage of grape cuttings, they should be kept in a hole or trench, in moist soil, at a depth below the ground freezing level in the given region.
In order for the cut cuttings to successfully survive the winter, care should be taken to store them. All cuttings are tightly packed in a plastic bag and left to be stored at a low temperature. There are several ways to preserve harvested planting material until spring:

Refrigerator - the hermetically packed grape vine is placed on the refrigerator shelf and stored there until planting or rooting. The disadvantage in this case is that this method can only be used for a small amount of planting material. It is not possible to store a hundred or several hundred cuttings in the refrigerator due to the large volume occupied.

The basement of a private home is another ideal place to store grape vines for planting. Here, constant temperature and humidity are naturally maintained and you can place many more cuttings than in the refrigerator. They can be stored either in polyethylene packaging or sprinkled with damp sand.

Summer cottage plot - some gardeners practice storing preparations for propagating grapes by cuttings in the spring right on their garden plot, burying them in the ground to a depth inaccessible to freezing in winter. As a rule, a trench is dug in an area unflooded by melt water, about 50 centimeters deep.

The bottom of the trench is sprinkled with wet sand, after which the prepared cuttings are laid. The cuttings are also sprinkled with sand on top, and then backfilled with earth. In this form, the cuttings can be stored until the onset of warm weather and immediate planting.

During storage, it is necessary to periodically check the sedimentary material for the appearance of fungus or swelling of the buds, which may be a consequence of the increased temperature in the storage room. If swelling of the buds is detected, then the cuttings should be moved to a lower temperature to avoid their germination before planting in the ground.
Throughout the winter, the condition of the cuttings is checked 2-3 times. If mold appears, it is carefully wiped from the cuttings, after which the cuttings should be ventilated, and at the end of the procedure they are packed again. When the fabric dries, it is slightly moistened; if mold is found on the fabric, it is replaced with a new one.
Preparing for rooting

To wake up the cuttings after winter sleep, you need to immerse them in a suitable-sized container with warm water for two days.
This should be done with those chibouks that have withstood storage well; the rest will have to be thrown away. You can check the suitability of the cuttings in the following way:
make a cross section that will show whether there is moisture in the process. Dry branches will not be able to produce either shoots or roots; they should be discarded. If the cut is moist and has a bright green color, this is a good sign, which means that growing grapes from cuttings at home will be successful.
The scion after winter storage often has dried out tips. To refresh them, the excess is cut off with pruning shears so that the length of the branch is 45-50 cm. Correct pruning is as follows: the stem is cut from below under the bud, and from the upper end between the buds, leaving a stump of about 3 cm.

After two days, the shoots need to be moved from water into a root growth stimulator solution. Such products are sold in specialized stores. It is better to lower the cuttings into the solution at one end, and then immerse them again in a container of water with the same end to a depth of 3-4 cm.

When vegetatively propagating grapes at home, before soaking, you can use a special agricultural technique called furrowing. To stimulate root development, shallow cuts are made with a knife or nail on the lower part of the cutting (from the level of 2 nodes to the bottom).
The shoots stand in water for quite a long time, so when the water evaporates, it is necessary to add fresh water. After two weeks, the topmost bud swells and sprouts; after three weeks, the root system begins to form. When the roots grow, the stems can be placed in the substrate.

The grapes propagate quite easily. Thanks to this, seedlings for planting can be easily grown on your own, without wasting time and money on choosing and purchasing garden materials. Moreover, it is possible to propagate a fruit plant even in summer. This article will tell you how to propagate grapes from cuttings at home.
 There are many different technologies for obtaining new fruit plants. Typically, plant breeders grow grapes from seeds. More experienced gardeners choose the propagation method by grafting. As for cuttings, even a beginner can grow a good seedling from them. Since propagating grapes by green cuttings in the summer is a fairly convenient and simple method, it is worth considering in more detail.
Propagation by green cuttings
To ensure successful propagation of grapes by cuttings in the summer, in the morning the cuttings are taken out of the basement and cut into pieces. To do this, use the middle and lower region of the plant. It is better to remove the top. Practice shows that cuttings taken from the top of the shoot often rot. Each of the segments should have a pair of leaves and 2 eyes. A stump 1 centimeter long is usually left above the upper eye. The bottom cut is usually made at an angle. Then the lower leaf is removed and the upper one is cut in half.
It should be noted that cutting grapes in the summer is a very budget option.
Prepared cuttings are placed in an aqueous solution of heteroauxin to 1/3 of their length. The holding time is from 8 to 10 hours.  The proportions of the solution are as follows: half a tablet per liter of water. It is important that the temperature in the room where the cutting is located is within +18-22 degrees. It's good to have diffused light. This significantly speeds up the root formation process. Before propagating grapes by cuttings, it is recommended to carefully prepare everything, be careful and careful.
Next, the green cuttings are planted in a special greenhouse box. The optimal container depth is from 40 to 50 centimeters. It is advisable to choose a box with smooth edges. This will make it easier to cover it with film or glass. Experts advise pouring a mixture of sand and earth at the bottom. It is necessary to take in equal parts. The thickness of the layer is about 10 centimeters. It’s worth adding a few centimeters of washed, clean, coarse-grained sand on top. After planting the cuttings, carry out abundant watering.
Before you root a grape cutting at home, you need to take into account that to speed up this process it is important to create high air humidity. For this purpose, the cuttings are sprayed 5 times a day. Use a spray bottle.  It's good if the water is warm.
Knowing how to cut grapes in the summer, observing all the necessary conditions, after 10 days, callus (influx) will appear on the lower part of the cutting, and the rudiments of roots will begin to form. After this, reduce spraying to 3 times.
A month later, the cuttings begin to harden. To do this, open the box in the evening for about 15 minutes. Gradually increase the time. Next, the culture is left open for the whole day. After all that has been done, by the fall the growth will be 50 centimeters, and a well-developed fibrous root system will be formed. After this, propagation of grapes by green cuttings involves digging up the plant and storing it in the basement. In the spring they are already planted in a pre-prepared place.
Some people germinate cuttings in water. Let's look at how to grow grapes from cuttings using this method. To do this, proceed according to the following scheme:
So growing grapes from cuttings at home is quite simple. Various methods are used for this. Everyone chooses the most acceptable one for themselves.
Planting cuttings
After propagation of grapes by cuttings has been successfully completed, the grapes are planted.
This falls in the spring time. For this, gardeners use special schemes. 
Landing algorithm:
- The site is being prepared. The necessary fertilizers are applied.
- Seating is being laid out.
- Planting material is taken and planted. Place the plant vertically with a slight slope. The cutting is immersed in the ground to the level of the upper eye.
- The planted cuttings are watered abundantly. Good water supply is the key to accelerated growth and proper development.
Gardeners' Choice
Garden crops have tasty fruits and high yields. Due to the rather high price, it is not always possible to purchase varietal seedlings. It's worth knowing how to propagate grapes. All methods of this process are quite simple and understandable. The main thing is to follow the correct technology and do everything consistently and on time.
Basic methods
The simplest and most accessible method for propagating grapes is to sprinkle the vines with soil. This procedure is carried out in the spring, if the vine is woody, and also in June, when it is still green. The top should be above the soil surface. Each shoot is separated from its neighbor in the fall and placed in separate containers, then stored in a special room until spring.
But this option is unsuitable for northern regions due to the fact that the roots that appear in the place where the shoot grows may die from frost.
Gardeners have modified the propagation method: in the last days of June, a bag containing a special soil-peat mixture is placed at the base of the shoot. In this place, by autumn, roots will form, and the seedling can be replanted. The disadvantage of this method is that young roots will be especially sensitive to lower temperatures.
You can use the layering method to obtain high-quality planting material. Layering happens:
- Deep. This method involves replacing mother (old) bushes. To do this, a groove is made with a hole in the place where the shoot is supposed to be located. The depth of this hole is about 50 cm.
- Horizontal. Seedlings intended for replanting are placed at a depth of 20 cm.
In the northern regions, a common propagation method is grape cuttings. Cuttings are harvested in the autumn and stored in a container with wet sand. This is the only way to protect them from drying out.
At the beginning of spring, they begin to germinate planting material in containers; after the first roots appear, they move the seedling into a bag filled with soil. The cuttings are planted in a permanent location in May.
In order to replace one grapevine variety with another, the grafting method is used. Propagation by seeds is not popular among gardeners, because out of a thousand seeds only 1-2 germinate well.
How to grow an apple tree seedling from a seed at home
The cutting retains all the properties of the mother vine. In order to propagate a grapevine by cuttings, you need to take care of this when pruning the bushes in the fall. During the period when unnecessary branches are removed, special attention should be paid to shoots that have a diameter of 7 to 10 mm and bear fruit in the summer. The cutting can be a shoot cut from the middle part of the fruit shoot or on a replacement knot.
Stages of preparing cuttings:

Cuttings that are prepared for winter storage must be periodically inspected and turned over.
 At the beginning of February, when there are several weeks left before planting in the ground for germination, it is necessary to remove the planting material from storage and inspect it for suitability. To do this, press on the cross section with a pruner. If droplets of water appear, then the safety of the cutting is good. But a twig can be considered dry when not a single drop appears. If moisture appears without pressure, then the planting material is rotten. It is necessary to make a fresh transverse cut and pay special attention to its shade: it should be light green, without any black inclusions.
Grafting grapes in the fall onto an old bush
For more successful propagation, you should soak the cuttings well in warm water for 48 hours. Change the water every day. Next, the cuttings are placed in a root-forming stimulator.
Before propagation from cuttings, grapes should be germinated at home using plastic bottles or cups.
Germination of cuttings:

Water the seedlings with warm water daily or once every 48 hours. The bottle is removed only after the seedling has 4 leaves and the roots are visible through the glass.
To germinate a vine in a bottle, you should perform the following manipulations:

Place this blank so that the peephole does not look at the window. When the shoot does not fit in the cup, it can be removed. Watering is carried out through a tray: a small amount of water is poured in and the bottle is placed in it for a quarter of an hour.
 You can also germinate green shoots cut at the initial stage of flowering. The shoots taken are those that are obtained at the moment of breaking off branches in the spring, as well as during pinching. Newly cut shoots are immediately placed in a bucket of water. After this, each shoot is removed one by one and cut into cuttings with 2 buds and placed in water.
Reproduction of dracaena at home by cuttings
A cut is made under the lower node of the cuttings; a stump of 2-3 cm in size should be left. The finished cuttings are planted in a plastic cup or box. It is necessary to keep such cuttings in a slightly dark place until they begin to grow intensively.
In the fall, the grown shoots should be stored in the cellar; in the spring they are transplanted into the ground and grown in a bucket until the onset of summer. Such seedlings are transferred to open ground in mid-September.
Breeding by layering
Layers are the lower shoots from which roots have sprouted. They are located in the soil without being disconnected from the mother vine until the seedling is fully mature.
To plant grapes on a plot, the easiest way is to buy ready-made seedlings; nowadays there is no shortage of them. But where do the seedlings on the market come from, how are they grown, and from what? After all, having minimal gardening experience, it is very easy to grow a grape seedling yourself, at home.
Basic methods of grape propagation
Grapes, like almost all shrubs, can be propagated both by seeds and by vegetative methods. Seed propagation is not used at home, since it is much more difficult than propagation by cuttings or layering. In addition, it is difficult to predict in advance what kind of variety will grow from seeds, so seed propagation is used mainly in breeding work.
In most cases, practicing winegrowers use growing grape seedlings from cuttings. Somewhat less often, propagation of various kinds is carried out by layering, that is, by digging in the vine, and by grafting onto already planted adult grape bushes of a different, frost- and disease-resistant variety. During vegetative propagation, all the properties of the bush from which the cutting, a long piece of vine, or even a single bud for grafting were taken are transferred to the new plant.
Propagation of grapes by cuttings: a method accessible to a beginner
The most commonly used method of propagating grapes is taking woody cuttings and rooting them. It is so easy to do that it can be recommended to a beginning winegrower. True, simple does not mean “itself”, you need to work hard, and a lot. First you need to get or buy cuttings of the variety you like somewhere and begin this interesting process.
Cuttings are harvested, as a rule, during the autumn pruning of grapes or a little earlier - when the leaves are no longer purely green, that is, the growing season is nearing completion, and the shoots are as mature and woody as they could be. It is impossible to leave the preparation of cuttings until the spring: it is unknown what will happen to the weather in winter, how well the bushes will survive the frosts.

When sending cuttings for storage, do not forget to sign
The highest quality cuttings are obtained from the middle part of the vine: the top is usually not fully mature, and there are few strong buds in the lower part. A fully ripened vine cracks when slightly bent, but does not break. Cuttings are cut “with a reserve”, that is, with 5–6 eyes, despite the fact that for immediate cultivation in the spring they will be required to be half as long. It is better if their diameter is at least 5 mm, and the shoot from which they are cut has grown over the summer to at least one and a half meters in length.
In most cases, cuttings will only be needed at the end of winter, and until then they must be properly preserved. You can keep them in the refrigerator if you have space, but it’s more convenient to store them in the cellar. The best temperature is about +1 o C. Before sending to the cellar, the cuttings are soaked for 1–2 hours in a 1% solution of iron sulfate and for a day in clean water. Store in plastic bags, leaving only the top outside. In winter, check the integrity and, if necessary, wash or just wipe off any detected mold. If it dries out, soak it.
Planting cuttings directly in open ground
In the warmest regions, woody cuttings can be planted directly into the garden bed. Sometimes they are planted even immediately after autumn harvesting, only slightly insulated with dry leaves or spruce branches. If you plant the cuttings in good soil, they take root easily and begin to grow with the onset of spring warmth. To do this, cuttings with 3–4 buds are buried almost completely in the ground in the fall, leaving only one bud above the ground. But until spring, this bud is covered with earth. Often, to preserve heat and moisture, the resulting mound is covered with plastic film, and in the spring a hole is made in it for the growth of young shoots. When it becomes warm and the cutting begins to throw out leaves and begins to grow, the film is removed and the mound is raked.
Most often, cuttings are planted in the garden bed in the spring. In the central regions, the probability of success of such propagation is low, but in the south in March, when the earth warms up to 10–12 o C, cuttings are planted in the same way as in the fall, however, after serious preparation. First, the cuttings removed from the cellar are disinfected, then both ends are cut off and soaked for several days in clean water.
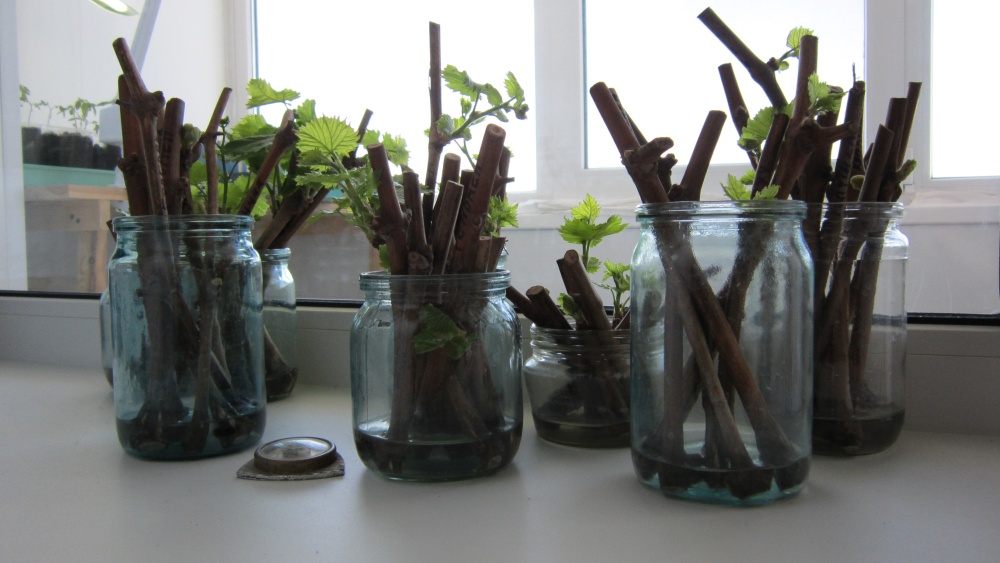
Then an oblique cut is made in the lower part just below the bud, and the top is cut straight, 2-3 cm above the upper bud. Place them in a jar, pour water to a height of 4–5 cm and keep in a warm place until the roots peck. The water is periodically changed and added to keep the level constant. If the water temperature in the jar is from 25 to 30 o C, and in the area of the tops of the cuttings is 5–7 degrees lower, after three weeks white tubercles will appear on the cuttings at the surface of the water.
The roots are not allowed to grow, and if the weather permits, the cuttings with the rudiments of the roots are planted deep in the garden bed. In this option, there is no point in making the cuttings short: you can plant them with 6 buds, the roots will be stronger. When planting at an angle in the spring, two buds are left above the ground. Water well and keep the soil moist. If frost is still possible, cover with non-woven materials.

It is better to plant cuttings with small roots in the garden bed.
At first, the cuttings will grow roots, but the leaves will bloom almost immediately. And by the onset of very warm weather, the shoots (one or two, no need to leave more, even if they appear) will quickly begin to grow. By autumn, a good seedling will grow from the cuttings. If the cutting was planted immediately in place, in well-fertilized soil and a pre-dug planting hole, you can leave the plant here. But usually it is transplanted to a permanent place, having prepared the hole in advance according to all the rules.
Growing a seedling from a cutting at home
As a rule, especially in the climatic conditions of the middle zone, grapes from cuttings begin to be grown at home. They do this in different substrates, and very often wet sawdust is used instead of garden soil. Generally speaking, there are a lot of options for growing seedlings from cuttings; everyone chooses the one that, in his opinion, is simplest. Work begins in February. The cuttings are unpacked, disinfected, washed and checked to see if they have overwintered well.
Lightly scrape off the bark on the cutting. If it is alive and can give life to a new plant, there will be green tissue under the bark. A different color does not guarantee success: the cutting has not overwintered.
Chibouks are cut from good cuttings: this is what cuttings with three buds are traditionally called. Let’s not introduce unnecessary terms; let them remain cuttings, especially since in the case of good buds, two will be enough for propagation. If you leave more than three buds, you will have to put out whole buckets at home, this is not necessary.
Make the upper and lower cuts, as already mentioned: the lower oblique, the upper straight, and place the cuttings for 2–3 days in a bath of water (preferably snow). Cuttings that are well saturated with water, in principle, can be immediately planted in prepared containers with substrate. They will probably grow there. But to be on the safe side, they often do things differently:

The most convenient containers are plastic one and a half liter bottles with a cut off, narrowed top. Only in the bottom you need to make several holes to remove excess water and place drainage from small pebbles or coarse sand. The best soil is considered to be a mixture of river sand and good garden soil (1:1), but some amateurs make do with sawdust, but they must first be doused with boiling water. The continuation of the work looks like this:

It is worth saying that the first part of the work described (germination in water until cuttings form) is not mandatory; many amateurs plant cuttings in a container with a substrate and without roots, growing them already there. This option, on the one hand, is simpler, on the other hand, more complicated: it is necessary to more strictly monitor the humidity, light and temperature conditions. In addition, there are grape varieties that do not produce roots well, and for them this number will not work.
Video: germinating cuttings in sawdust
Propagation of grapes by green cuttings
Growing seedlings from green cuttings is possible for most shrub plants; it is also used for grapes. On the one hand, this is a simpler procedure: it is performed in the summer, and there is no need to start plants at home with jars, and there is no need to store cuttings in the cellar in the winter either. On the other hand, it is possible to grow a seedling from a green cutting only if you have a good greenhouse, in which you will have to maintain high and constant air humidity for a long time. Therefore, such propagation is more suitable for industrial nurseries, where there is special equipment for creating artificial fog in a confined space. The algorithm of actions is as follows:

Thus, the essence of this technique is that the planted cuttings are constantly in conditions of high humidity (about 80%, and in the heat - up to 100%) and air temperature from 20 to 30 o C. Then after a month and a half they have good roots and shoots up to 30 cm long grow, after which the cuttings are hardened and then transplanted into a schoolhouse. Obviously, in ordinary summer cottages, propagation of grapes by green cuttings is extremely difficult, but enthusiasts try, and some succeed.
Video: germinating green cuttings at home
Propagation of grapes by digging in vines
Many shrubs are propagated by layering, that is, by digging branches (shoots) in one way or another. This option is also possible in the case of grapes, and if successful, you can get several new grape plants in one summer. In this way, they usually try to propagate difficult-to-root varieties. Since future seedlings essentially feed from the roots of the mother bush, they develop well and form a powerful root system of their own.
Digging in a woody shoot
This is usually done in early spring, before the growing season begins. Choose conveniently located powerful shoots from last year. In the right place, they dig a fairly deep ditch, up to half a meter, extending from the bush to the place where they are going to bury the vine. Naturally, it should not be deep directly next to the bush, so as not to damage the roots. Well-fertilized soil with humus and superphosphate is poured into the ditch, at the very bottom, and a shoot is laid. You need to bend it carefully so as not to break it, and you can attach it to the bottom of the ditch with a piece of bent thick wire or simply press it down with a heavy stone.

It’s not difficult to spread out the vine, but you have to do it carefully so as not to break it
Where there will be a new bush, the vine is carefully bent, taken out and tied to a stake. All eyes located from the mother bush up to the point of this bend are removed. Many specialists tie it tightly with wire at the very beginning of the shoot, near the mother bush, to make it easier to separate a new plant later in the year. The ditch is gradually filled with soil and watered well. As a rule, within a year good roots grow in the buried area, and the following spring the new plant is separated from the mother plant.
Digging in green shoots
In the summer, in June or July, you can dig in the powerfully grown green shoots of the current year. They do this in a similar way, bringing to the surface the tip of the shoot with two or three leaves. If the shoot is very long, it can be buried with a “sinusoid”, bringing it to the surface several times. All parts remaining underground must be secured to the bottom of the ditch with pins.
If you do not allow the soil to dry out in the summer, for well-rooted varieties you can even get several new bushes this way by next spring.
Performing “Chinese” layering
Chinese are called layering, which is performed by completely laying a lignified shoot into the ground. This is done in the case of the most poorly rooted varieties. For installation in early spring, choose a long shoot located at the very base of the bush. Dig it all the way into a ditch no more than 20 cm deep. Also into fertilized soil, also pinning it to the bottom of the ditch. But the ditch is not completely filled up: the layer of soil above the vine is first made no more than 5 cm. And only as new shoots emerge from the buds and grow, soil is gradually added to the ditch. Keep the trap moist at all times.
Usually new shoots grow from each buried bud; In the fall, carefully dig up the vine and cut it into several new plants. However, for this to happen, you have to sacrifice part of the harvest and reduce the load on the mother bush. In the summer it is necessary to break out not only the extra bunches, but also all the stepsons and some of the young shoots.
Video: laying green vines in the ground
Grape propagation by grafting
Like most fruit trees, grapes can be grafted. Carrying out grafting is no more difficult than, for example, in the case of an apple tree, but not all varieties are compatible, and success in each specific case is not guaranteed. Therefore, it is advisable to study the literature before the operation, look for which adult bushes can be grafted with one or another variety. If you haven’t found such information, all you can do is experiment.

Grafting grapes is as common as grafting fruit trees.
In the case of grapes, all known grafting methods are used (splitting, copulation, budding, etc.), but the number of options is even greater. They are grafted with both last year's cuttings and those cut from the current year's shoots. Both in the standard or last year's escape, and in the current year's escape. Therefore, the appropriate terminology is used: “black to black”, “black to green”, etc. There is even a desktop, winter vaccination.
So, for example, “black to black” grafting is performed in the spring, when active growing season has not yet begun. The scion is made from cuttings cut in the fall and stored in the cold. For such grafting, the buds on the cuttings should be slightly swollen. It is performed using copulation methods. Cuttings that are suitable in thickness to the shoot of the rootstock are selected, soaked, oblique cuts are made on the cuttings and rootstock, they are connected and the grafting site is firmly tied. When new shoots for cuttings grow to 25–30 cm, they are pinched.
In the case of “black to green” grafting, last year’s cuttings with emerging buds are grafted onto young, powerful green shoots of the current year. This type of grafting is usually performed using the “split” method. It is possible throughout the growing season, as long as it is possible to preserve lignified cuttings harvested in the fall in the cellar.
It is also possible to graft into the trunk of an old bush when the top layer of soil is dug up in early spring; The cuttings are grafted underground, usually using the “split” technique. It is done at a depth of about 15 cm. The cutting is completely buried with earth.
Video: grafting grapes into a standard
Budding, that is, bud grafting, is carried out on a green vine in June or July. As on fruit trees, it is possible to implant a bud into a shoot behind the bark by making various cuts: T-shaped, longitudinal, in a gap, etc. The grafting site is wrapped very well with film, and after a month the bud takes root well.
A detailed description of grape grafting methods is beyond the scope of this article, but it is quite accessible. After reading and a little practice, any gardener with minimal skills in caring for trees and shrubs can plant grapes.
Grapes are a liana, but, in fact, they are very similar to many fruit bushes, and their propagation techniques are generally the same as, for example, currants. The goal - obtaining a new seedling - can be achieved by known methods: germination of cuttings, layering, grafting. Performing all these operations is, to one degree or another, accessible even to a beginner, and if at first it’s scary, you just have to try.